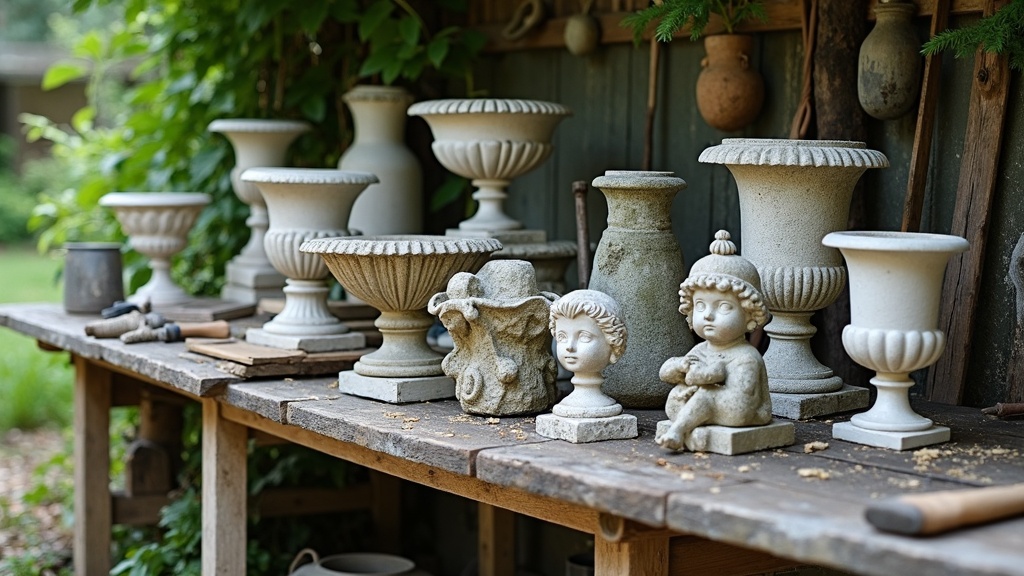
Antique garden ornaments hold a special spot in many yards, parks, and historic estates. These pieces tell stories from another era and add loads of character to any outdoor space. Time, changing weather, and even regular use can wear them down, but proper restoration can make a world of difference. I’m going to break down the basics of antique garden ornament restoration to help you preserve and refresh these unique treasures.

Why Restore Antique Garden Ornaments?
Antique ornaments are seriously valuable, and that goes beyond just dollars. Their beauty and historic charm set them apart. Pieces like cast iron urns, stone statues, terracotta pots, and old fountains do more than decorate your space. They link us to the past and boost curb appeal in ways newer items just can’t match.
Restoring these items helps prevent further damage, keeps the garden looking sharp, and even helps preserve local heritage. Whether you want to keep a family heirloom in top shape or revive a flea market find, restoration gives these pieces a new shot at life. The restored pieces can completely transform an average outdoor area by infusing it with personality and history.
Getting to Know Your Garden Ornament
Before picking up paint or scrubbing away dirt, I always say it’s smart to know what you’re working with. Each piece has its own story, so start by figuring out a few key details:
- Material Type: Is it stone, iron, concrete, terracotta, or maybe lead? Each one needs a different approach.
- Age and Origin: Older pieces or ones from certain makers might need gentler care, especially for items that are rare or from well-known designers.
- Condition: Take note of chips, cracks, moss, rust, or missing pieces. A good inspection helps you choose the right restoration steps, so you don’t accidentally do more harm than good.
If you’re unsure, snapping a few photos and chatting with a restoration pro, local historian, or even garden antique dealers can point you in the right direction.
Common Restoration Challenges (and How to Tackle Them)
Every antique garden ornament brings its own quirks, but some problems pop up again and again. Here are a few I’ve dealt with most often, plus a quick tip for each one:
- Soil and Moss Build-Up: Gently clean with a soft brush, water, and maybe a mild soap for tough grime. High pressure water can damage softer surfaces, so it’s better to skip the pressure washer if you want to avoid harm.
- Rust on Metal Items: Remove loose rust with a wire brush. For stubborn areas, a rust converter or remover can be super handy. Finish with a metal primer and weatherproof paint or wax if needed. Keeping metal items covered with wax can also keep rust at bay for longer.
- Stone Erosion: Handle fragile stone with care. Sometimes, just cleaning is enough, but serious cracks or missing chunks may call for professional help or special stone fillers. Soft bristle brushes work best, and avoid acidic cleaners on limestone or marble.
- Broken or Missing Parts: Restoration epoxies or specialist adhesives work for simple fixes. For bigger repairs, you might need to cast replacement parts or consult a skilled pro. It’s not uncommon for outdoor statues to need new hands, feet, or decorative details remade to original specs.
- Paint Flaking or Loss: Peeling paint needs to be gently sanded away. Once you’re down to a stable layer, prime and repaint with exterior grade paints designed for your material. Avoid thick coats and let each layer dry fully before applying the next.
Easy Steps for DIY Garden Ornament Restoration
Tackling your own restoration project is easier with a little knowhow. Here’s a handy step-by-step plan I use:
- Clean Your Ornament: Brush off dirt, leaves, and organic debris. Mix up a bucket of warm water with a little dish soap, and use a soft brush or cloth. For really stubborn moss or algae, try diluted white vinegar but keep it away from delicate surfaces like old marble or limestone.
- Remove Old Paint or Rust: Work with sandpaper or a wire brush on small areas. Specialty paint removers can help, but doublecheck they’re safe for antiques. For iron pieces, always treat rust before you repaint.
- Make Basic Repairs: For small chips or cracks, use a filler made for your ornament’s material. Let everything dry or cure fully according to the package instructions. For larger missing chunks, sometimes a mold or form is needed to create a new piece, especially for ornate designs.
- Paint or Seal: Pick paints, stains, or sealants made for outdoor use. For stone or terracotta, a breathable sealant helps prevent moisture troubles down the road. Always follow package instructions and aim for dry, mild weather during application.
- Final Touches: Stand back and look over your work. Little finishing details, maybe some gentle distressing to keep an authentic look or buffing newly waxed metal, will make your piece shine. After you’re finished, take a photo to track your progress over time—it’s surprising how much of a difference restoration makes!
Restoration takes patience, but the payoff is seeing your garden ornament looking better than ever and preserving a slice of garden history. Plus, there’s satisfaction in knowing you handled the job on your own.
Materials and Tools You’ll Find Useful
You don’t need an entire workshop to restore vintage garden ornaments, but having these supplies makes the job smoother:
- Soft and medium stiffness brushes
- Microfiber or cotton rags
- Mild cleaners (like dish soap or diluted vinegar)
- Sandpaper (various grits)
- Wire brush (for metal pieces)
- Rust remover or converter
- Paint scrapers
- Outdoor grade paints and primers
- Sealant or wax (for metal, terracotta, or stone)
- Appropriate adhesives or fillers (check product labels for material match)
- Protective gloves and eye protection
Most of these are easy to find at hardware or garden supply stores. Specialty restoration products can be ordered online or picked up at shops catering to restoration pros. You may also want a paint respirator mask for working with fumes or dust, plus drop cloths to protect your workspace.
Extra Tips for Preserving Antique Ornaments LongTerm
Restoration isn’t a one-and-done deal. A few ongoing habits go a long way to keep antique garden ornaments looking great for years on end:
- Regularly dust off debris and rinse with water so dirt doesn’t build up and cause wear.
- Apply a new layer of paint or sealant every few years in line with product guidelines and the weather in your region.
- If you spot cracks, rust, or moss, treat them as soon as possible to stop damage from spreading before it gets serious.
- Consider moving fragile or precious items indoors during winter or really extreme weather to avoid unnecessary wear. Alternatively, cover delicate pieces with a tarp or temporary shelter if moving them isn’t practical.
Paying attention year-round helps you catch problems early, making sure your restoration work stands the test of time. A seasonal garden walk can help you notice changes like new cracks or moss patches so you can fix issues before they get worse.
Picking Out Reproduction Parts (If Needed)
Sometimes, parts of an ornament are just too far gone or missing. Seeking out reproduction finials, handles, or other pieces is common, especially for urns, benches, and fountains. Here’s how I usually approach it:
- Bring clear photos and measurements if you’re searching for parts at garden centers or salvage yards. Pictures from a few angles will help sellers get a better idea of what you need.
- Check online antique forums and specialty shops. There are some great places that sell reproduction hardware based on historical designs, and you may even stumble upon someone with just the piece you need.
- If something absolutely can’t be matched, consider having a new piece custom made by a local craftsperson. Sometimes, adding a hand-crafted detail can set your ornament apart in a good way while still staying true to its vintage style.
Replacing parts is totally okay and won’t ruin the character of your antique. Just aim for the closest match possible so your ornament keeps its cohesive look and timeless charm.
Frequently Asked Questions: Antique Garden Ornament Restoration
Here are answers to a few questions I hear most often from folks getting started with ornament restoration:
Question: How can I tell if my garden statue is really old or just made to look old?
Answer: Older ornaments often have wear in spots that make sense, like weather-facing surfaces, and may show tool marks or maker’s stamps. Newer reproductions sometimes have a too-even finish or artificial aging. If in doubt, bring it to a local antique dealer or appraiser with outdoor decor expertise to help you spot the difference.
Question: What’s the safest way to clean fragile or crumbly pieces?
Answer: Skip harsh chemicals and brushes. Instead, use a gentle stream of water, your hands, and a soft cloth. If you feel unsure, check in with a pro before trying to clean things like historic stone or lead. Sometimes, leaving some patina is better for both preservation and aesthetics.
Question: Does restoring an antique ornament ruin its value?
Answer: Typically, honest repairs and cleaning actually help preserve or improve value. Overcleaning or using modern paints in the wrong way can hurt value, so when in doubt, keep things simple and gentle. Try to document any significant restoration work for future reference, which collectors may appreciate.
Wrapping Up
Antique garden ornaments are a real treat for any outdoor space. Learning some restoration basics, picking the right tools, and treating materials with care will help you get the most out of these eye catching pieces. A little patience and good products really make a difference, letting your garden history shine for years and making each piece, whether grand or humble, a standout in your landscape.
Here’s a little transparency: Our website contains affiliate links. This means if you click and make a purchase, we may receive a small commission. Don’t worry, there’s no extra cost to you. It’s a simple way you can support our mission to bring you quality content.”

What a wonderfully detailed guide! I love how you emphasized really getting to know each garden ornament before diving into restoration, it makes such a difference in preserving their unique character. The tips on gentle cleaning and choosing the right materials show just how careful we need to be with these historic treasures.
I’m curious, have you ever encountered a restoration project where a missing piece was impossible to match exactly? How did you decide whether to create a custom replacement or embrace a subtle difference that adds a bit of new character?
Thanks for sharing such practical advice for anyone wanting to bring antique garden ornaments back to life!
“Thank you so much! ????✨ You nailed it—half the magic is in ‘listening’ to what the piece is telling you before you touch a brush or chisel.
And oh yes, the ‘mystery of the missing piece’! Sometimes it feels like detective work, other times like improv theater. ???? If it’s a really significant feature, I’ll sculpt a custom replacement and blend it in so the ornament can shine as close to its original self as possible. But if it’s a smaller detail, I often let the new piece have just a whisper of difference—like a little wink from history reminding us that time has left its mark.
After all, every ornament’s story is part classic novel, part choose-your-own-adventure. ????”