
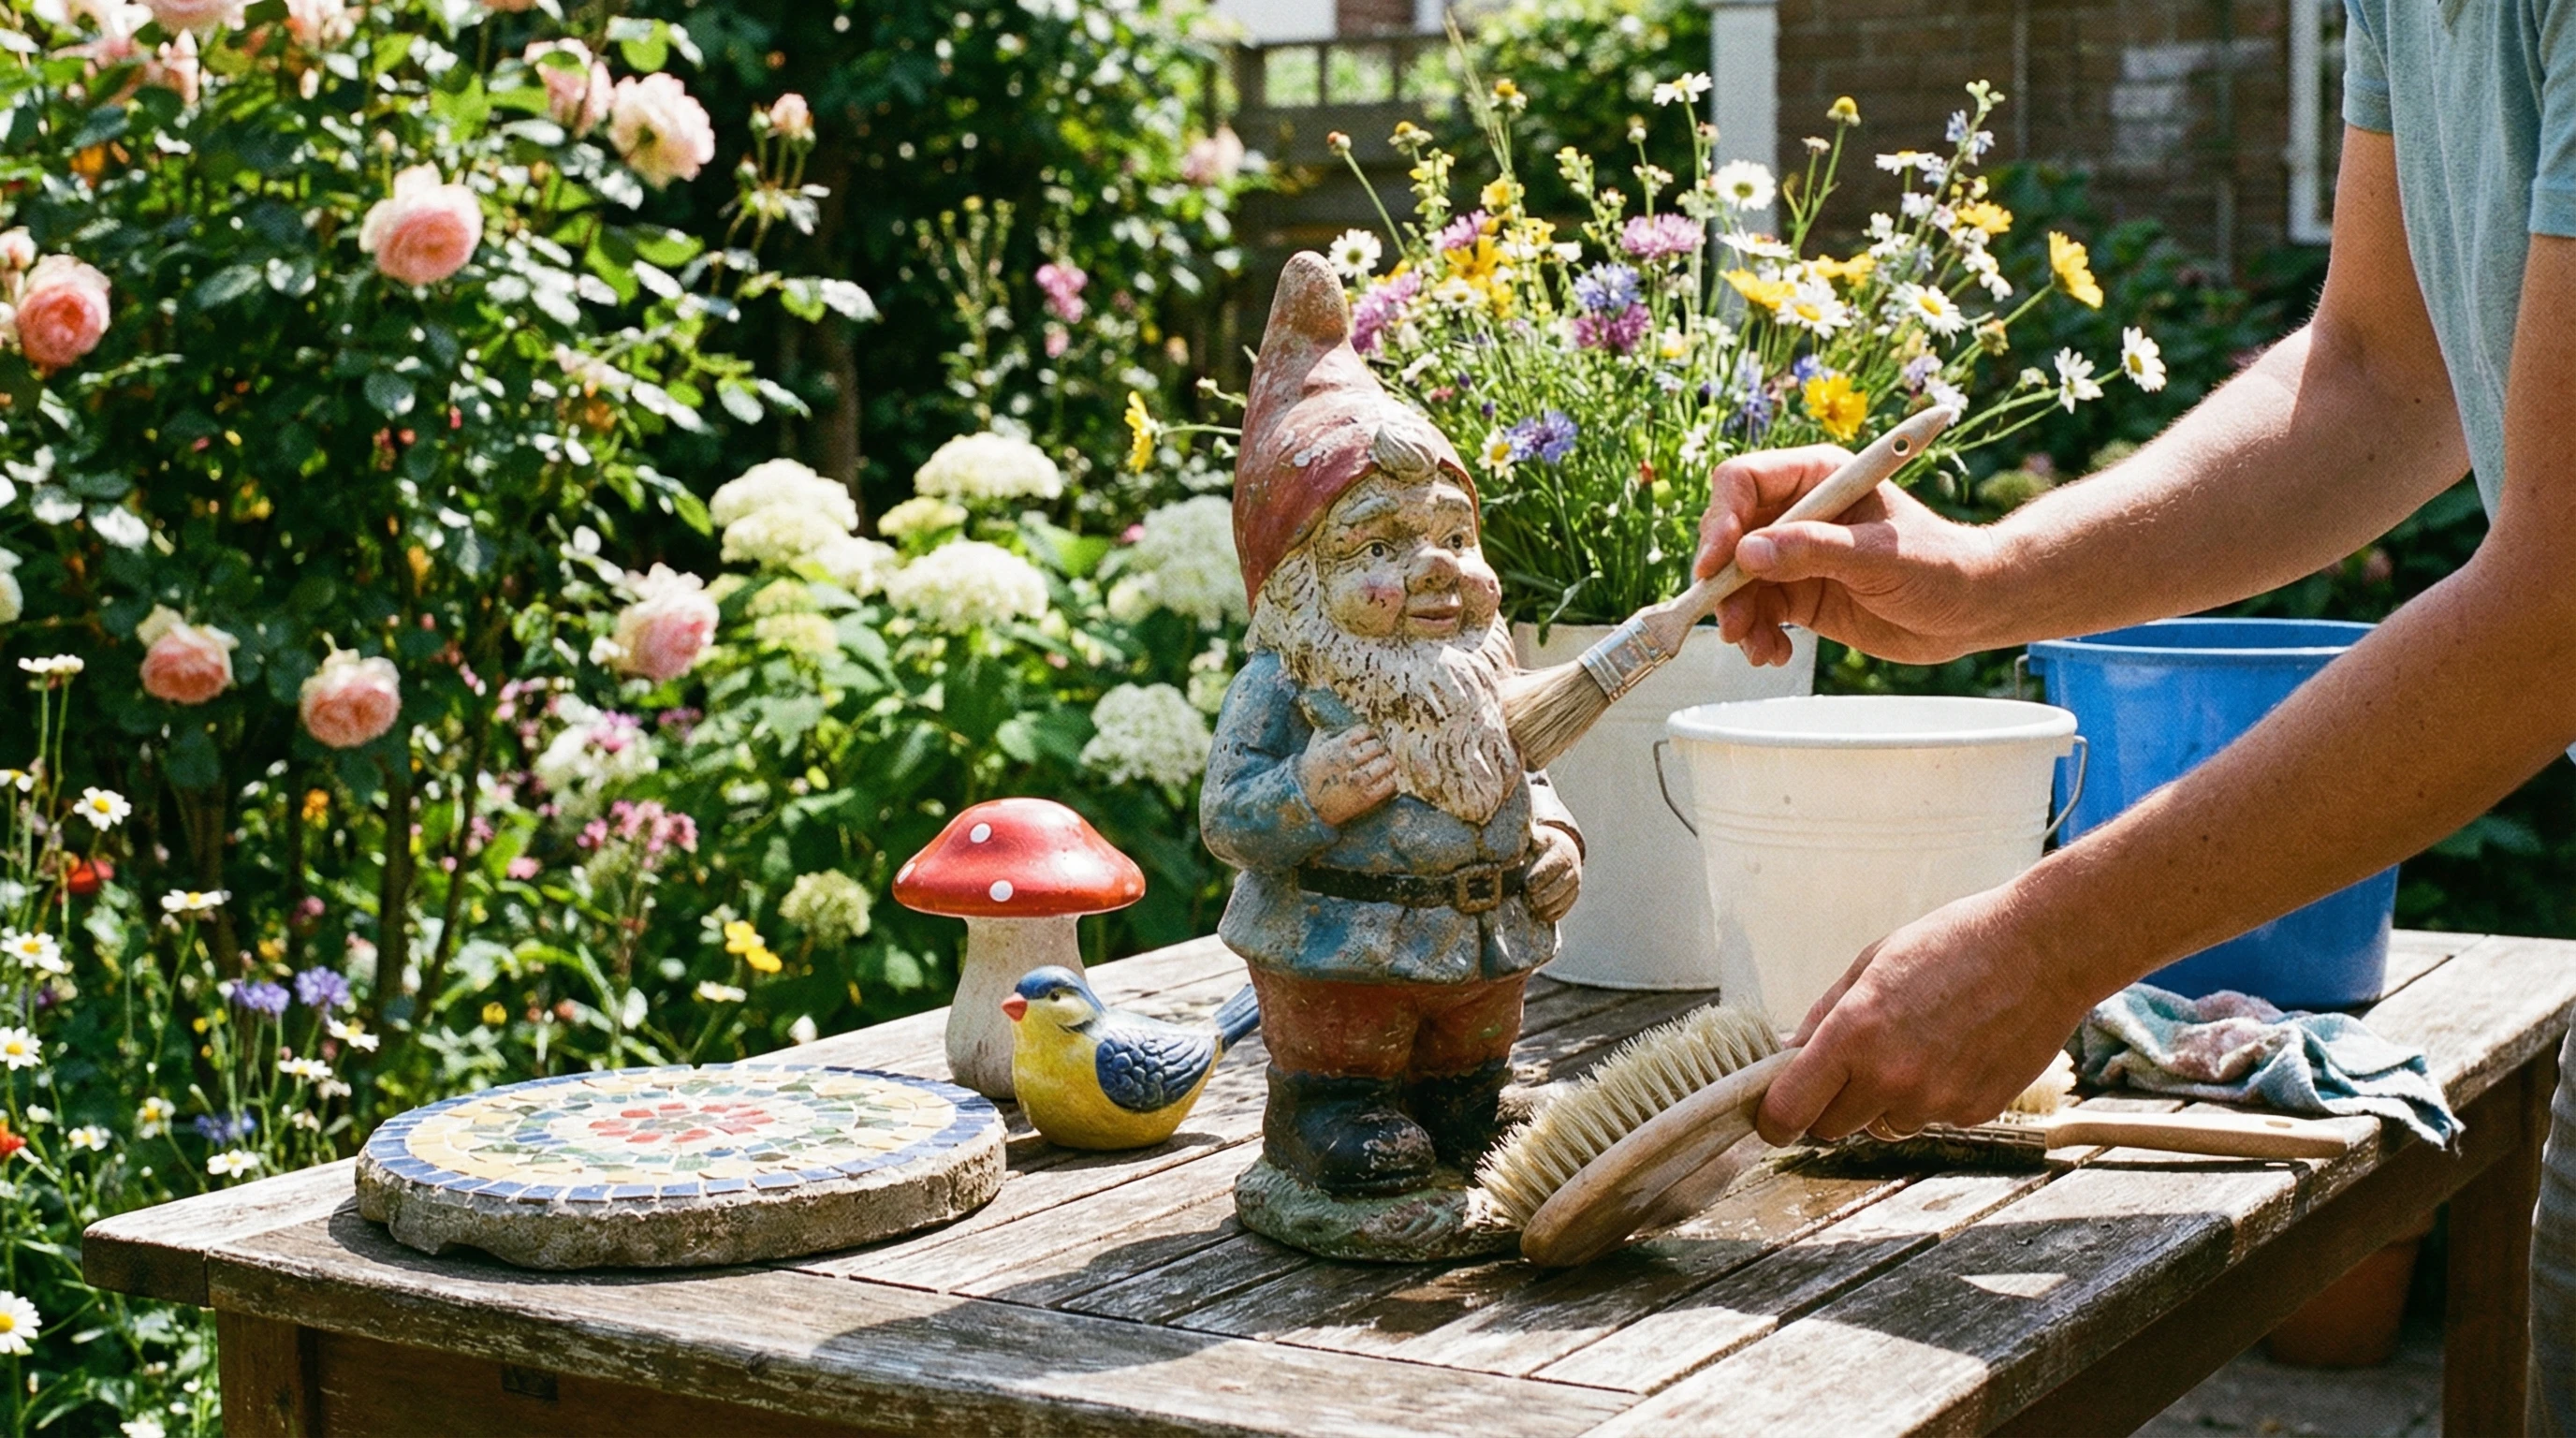
 Painted garden ornaments bring color and personality outdoors, but they’re magnets for dust, algae, and all kinds of grime. Keeping those vibrant finishes looking fresh is quite different than washing off ordinary garden tools or unpainted statues.
Outdoor paint faces attacks from sunlight, rain, and sudden shifts in temperature. That’s why, for cleaning, your choices matter. If you pick the wrong tools or harsh cleaners, you risk the finish becoming dull or peeling away entirely. Luckily, with the right approach, keeping those ornaments looking sharp is not difficult or time consuming.
In this guide, I break down the best ways to clean painted garden ornaments, what to stay away from, and a few handy tricks should your ornaments need extra attention to bring them back to life.
1. Start Simple: Dust & Dirt Removal
Most garden ornaments need only a bit of basic upkeep to keep looking good. When you see just dust, pollen, or a light covering of loose dirt, skip the fancy chemicals and keep it simple.
How I Handle Light Cleaning:
- Soft bristled brush: Perfect for loosening dirt hiding in grooves and design details.
- Damp microfiber cloth: Gently wipe surfaces to collect dust without pushing it deeper into the paint or scratching the finish.
- Garden hose: Use on a low pressure setting to rinse away loose dirt. Keep the nozzle backed away—there’s no need for a concentrated stream.
Never scrub or use rough sponges, as this can wear down paint or leave marks. A gentle touch and soft cloth are often all you need.
2. Deep Cleaning: Soap, Water, and What Works
When dirt, bird droppings, or green algae appear, it’s time for a little soap and water. But not every soap is safe. Some might strip paint or lead to fading if you wash too often.
Recommended Cleaners:
- Mild dish soap: A couple drops in a bucket of warm water is gentle on painted surfaces but strong enough to tackle grime.
- Castile soap: This plant based soap cleans well without heavy chemicals and is great for delicate paint jobs.
Cleaning Steps:
- Dip your soft cloth or sponge in soapy water and wring it out. Keep it damp rather than soaking.
- Gently wipe the ornament, paying attention to decorative details, and rinse as you go to prevent soap scum from drying on the paint.
- Use a cotton swab or soft toothbrush to reach into cracks or crevices.
- Pat dry with a clean towel or let air dry in the shade.
I always test the soapy mixture on a small, hidden area to make sure the paint responds well before cleaning the whole piece.
3. What to Avoid: The Paint Destroyers
Some cleaning methods do more harm than good—especially on acrylic or spraypainted ornaments.
Skip These Cleaners and Methods:
- Bleach or ammonia based products: These strip away color and may cause paint to bubble or peel.
- Abrasive scrubbing pads: Even if grime is stubborn, they can scratch and wear down painted surfaces.
- Pressure washer: It’s tempting for fast cleaning, but the focused spray—even at low settings—can peel the paint away.
- Acidic cleaners: Items like vinegar, lemon juice, and other acids are likely to fade paints, especially on resin or concrete bases with a painted finish.
If you aren’t sure, check the care label or look up the paint manufacturer’s recommendations online. A quick check can save a lot of hassle later.
4. Mold, Mildew, and Algae: Taming the Green
Outdoor ornaments can quickly grow green or black patches, especially in damp, shady spots. Mild mold or algae isn’t the end of the world for painted surfaces; just use a gentle approach that doesn’t harm the paint.
Easy Mold and Algae Remedy:
- Mix one part mild dish soap with two parts water and add a splash (about a tablespoon per gallon) of hydrogen peroxide for more cleaning power. Hydrogen peroxide, when watered down well, won’t usually harm outdoor paint.
Using a soft sponge, wipe the ornament and rinse well. For tough stains, let the mixture sit for four or five minutes but don’t let it dry out. Rinse, then dry the piece thoroughly.
5. Restoring Shine: Paint Safe Tricks
Years outdoors can dull even the most vibrant ornaments. Fortunately, you can liven them up safely.
- Remove mineral spots with a baking soda and water paste applied gently with a soft cloth, then rinse with clean water.
- For some extra shine, apply a small dab of car wax or a clear polyurethane spray—if the paint and ornament label say it’s safe. Always test on a hidden area first.
6. Special Materials: A Little Extra Attention
Garden ornaments are made from all sorts of materials. The type really matters when you’re cleaning.
- Ceramic: Painted ceramics chip easily, so avoid soaking and scrubbing. Stick with lukewarm water and gentle handling.
- Resin or plastic: These can quickly fade in direct sunlight, and paint scratches show easily. Use only gentle soaps and wipes, never rough sponges.
- Concrete or stone: Durable, yet if painted, needs the same mild care. Skip powerful acid cleaners as they can eat away at both paint and stone.
7. Maintenance Tips: Habits That Help
Bright painted ornaments don’t require a lot of scrubbing if you get into good maintenance habits.
- Wipe off bird droppings and tree sap quickly; they’re much harder to remove if left alone.
- At the start of each season, give your ornaments a soft rinse with the hose, and spot clean any marks you notice. This makes deep cleaning seldom necessary.
- If the ornaments stay outside through winter, look for paint cracks or peeling. Small touchups with outdoor acrylic paint keep water from working its way underneath.
It also helps to move smaller ornaments into the shed or covered porch through harsh weather, extending both the paint and material’s life.
8. When to Repaint or Restore
If paint is badly faded, peeling, or the ornament carries sentimental value, sometimes a full cleaning won’t cut it. A new coat of outdoor paint, or getting a professional restorer involved for intricate pieces, can make the ornament feel brand new for many more seasons.
Final Tips
Cleaning painted garden ornaments is really about gentle care, not a battle with sponges and sprayers. Fast, regular touchups and using the gentlest cleaning supplies make caring for ornaments a breeze, helping you avoid dull or peeling paint. If you’re unsure, stick to the softest cloths and the mildest soaps. With the right care, those garden gnomes, butterflies, and animal statues hold their color and charm through every season outdoors.
To step up your garden’s look even more, check out creative ways to arrange and display ornaments, complement them with new plants, or refresh a small section of your garden each year. Giving a boost to both your ornaments and your gardening routine can make your outdoor space truly eye-catching.
Looking toward the future of restoration, are you seeing any breakthroughs in nano-coating technologies or ‘liquid glass’ (SiO2) sprays that are specifically safe for aged outdoor paint? I’m curious if these ‘self-cleaning’ invisible layers could be the ultimate innovation for garden ornaments—allowing dirt to simply wash away with the rain while providing a permanent UV shield for the original artwork.
Leah, that archaeological dig line made me laugh—because wow, is it accurate ???? We’ve all had that moment where a “whimsical accent” suddenly looks museum-grade ancient.
You’re asking exactly the right questions, so here’s the straight-talk, homeowner-friendly version:
On clear sealants or wax after cleaning ceramic:
Yes, you can add a protective layer—but this is where restraint matters. For fully glazed ceramics, a breathable, UV-resistant clear sealer (made for masonry or ceramic) can help repel dirt and slow fading without much risk. The key is breathable.
What you want to avoid are non-breathable acrylics, thick varnishes, or waxes on porous or partially glazed ceramics. Those can trap residual moisture, and once winter hits, freeze-thaw cycles may cause cracking or spalling. My rule of thumb:
If it absorbs water → breathable sealer only, very light coatsIf it doesn’t absorb water → sealer optional, not mandatory
And always let the piece dry completely—like several warm, dry days—before sealing.
As for nano-coatings and “liquid glass” (SiO₂) sprays:
This is a fascinating area, and you’re not wrong to be curious. These coatings do show promise—especially for UV resistance and dirt shedding—but right now, most are best suited for modern finishes, automotive paint, or architectural surfaces. On aged or hand-painted outdoor ornaments, the risk is that they can:
Alter sheen or color depthBond too aggressively to fragile paint layersBe difficult (or impossible) to reverse
So while they’re not quite the “ultimate innovation” yet for vintage garden art, I do think we’re getting closer. In the meantime, the safest approach for painted pieces is still gentle cleaning, shade when possible, seasonal protection, and breathable conservation-grade coatings rather than permanent, high-tech layers.
Honestly, your comment reads like someone who truly cares about preserving character—not just making things shiny—and that mindset alone goes a long way toward keeping garden art looking loved instead of excavated ????
Thanks for such a thoughtful, forward-looking question.
With Gratitude
Much Love
Good Luck & Have Fun