
Restoring a garden statue is one of those projects that brings a lot of satisfaction, especially if a beloved piece has been chipped, weatherworn, or even cracked after years outside. I’ve picked up a bunch of handy tricks over time from working on statues made of concrete, stone, resin, and even metal. Knowing the right approach and products makes a big difference, saving both money and heartache along the way. I’m sharing my favorite expert tips so you can give any tired or battered garden statue a new lease on life. Garden statues turn backyards and green spaces into eye-catching retreats, so breathing new life into them really pays off.
Why Garden Statues Need Restoration and What Causes Damage
Outdoor statues face a lot: rain, sun, wind, and even bird droppings or accidental bumps from gardening tools. Over time, paint starts to peel, cracks may appear, or moss and algae can take over. Freeze-thaw cycles are especially tough, since water gets into small crevices, freezes, and expands, causing larger cracks or even breaking off pieces. Metal statues can rust, and resin ones can fade or become brittle.
If a statue looks rough, it doesn’t always mean it’s a lost cause. Early repairs help stop problems from getting a lot worse. Cleaning, patching, sealing, and repainting (when needed) keep statues looking great and standing strong for years. Regular inspections are helpful for catching trouble early, so I make a habit of checking statues each change of season to protect them from the elements.
Getting Started: Safety, Cleaning, and Prep Work
Before fixing or repainting anything, starting with a clean surface is really important. I always put on gloves and, if there’s a lot of dust or mold, a dust mask or simple respirator is smart too. Preparation keeps things safe and makes repairs stick. Here’s how I make sure every statue is ready for work:
- Dry Brushing: Use a stiff brush to knock off loose dirt, flaking paint, algae, and moss. Old toothbrushes or paintbrushes work for details.
- Soapy Wash: Mix mild dish soap with warm water, and gently scrub the statue. For stubborn moss and mildew, a mix of one part white vinegar to three parts water tackles it without harsh chemicals.
- Rinse Well: Rinse with plain water and let everything dry completely before making repairs.
This prep step shows you all the imperfections clearly and helps repairs stick better. A little patience at this stage makes a big difference later, and gives you a chance to spot small cracks or flaking areas that need attention.
Repairing Common Statue Problems
I’ve come across all sorts of statue fixes. The right repair materials depend on what the statue’s made from, so I always check the surface once clean and dry before choosing a method. Sometimes, I find that statues might look worse after cleaning, but don’t let that discourage you; it just makes the repairs easier and more thorough, and helps you get the most out of each step.
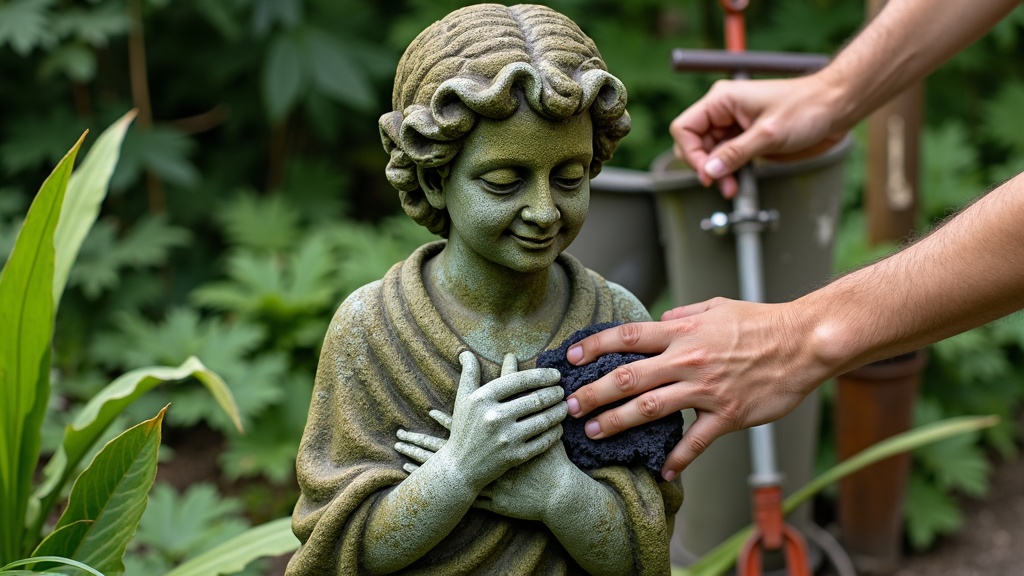
Fixing Concrete and Stone Statues
- Small Cracks: Concrete patching compound or epoxy is super useful for thin cracks. I work the product in with a putty knife, then smooth the area.
- Larger Chips or Missing Pieces: Concrete repair mortar lets you rebuild missing bits. I shape it as closely as possible, then smooth with a damp sponge before it sets.
- Blending Repairs: Once dry, a little sanding with fine grit paper helps blend the new patch with the old surface.
These steps also work well for statues with decorative bases or pedestals. For statues shaped with lots of detail, using a sculpting tool on fresh mortar helps match the original finish, so don’t be afraid to experiment gently.
Resin and Polyresin Statues
- Hairline Cracks: Two-part epoxy putty made for plastics works really well. I knead it, shape it into the gap, and smooth with a damp finger.
- Larger Holes or Chips: Epoxy putty or a resin repair kit made for outdoor use does the trick. After hardening, I sand it flush with the rest of the surface.
With resin statues, I’ve found warming the piece a little before using putty or glue means it sticks better—not hot, just left in the sun for 10 minutes. This small step helps with a smooth application and longer-lasting results. Remember, always check instructions for any repair product to make sure it will hold up outdoors.
Metal Statues
- Rust Removal: Wire brushes or fine steel wool gently scrub off rust. For tougher jobs, rust converter sprays prepare the metal for painting.
- Structural Repairs: A two-part metal epoxy bonds broken joints or replaces small lost pieces; just read labels for outdoor safety.
If a metal statue feels hollow or rattles, it’s sometimes worth adding a bit of expanding foam to stabilize from the inside. Just a bit, though, as too much can cause bulges or leaks.
Painting, Touch-Ups, and Protective Finishes
A fresh coat of paint or sealer makes every restoration project pop. Picking outdoor-safe products is really important, since sun and rain can wear paint and sealant quickly if not made for the job. Here’s how I usually tackle this step:
- Primer: For bare concrete or metal repairs, a coat of outdoor primer helps paint stick better and last longer.
- Paint: Acrylic latex exterior paints work nicely for concrete and stone, while spray paint for metal is quick and even. For resin, look for paints labeled specifically for plastics or outdoor items.
- Details: Small brushes are my go-to for any highlights or intricate touches. It’s easier to add shading and weathering details bit by bit, building up the look for more realism.
- Sealer: A spray or brush-on clear acrylic sealer protects paint and surface repairs. Matte, satin, or gloss are all options; I usually pick based on the statue’s original look.
For painted metal statues, a rust-preventing clear topcoat helps avoid future corrosion. Touch-ups every few years keep things looking fresh, especially when facing freezing winters or really sunny summers. For an extra boost, you can use a UV-blocking spray to help outdoor colors last longer, especially in bright or open gardens.
Tips for Preventing Future Damage
Restoration takes work, so stopping future damage is worth a little extra care. Here are a few tricks I rely on now:
- Seasonal Placement: Move statues off lawns or damp soil to sturdy stepping stones or gravel, which helps with drainage and lowers moisture risk.
- Winter Storage: For lightweight or delicate statues, storing them in a garage, shed, or covered porch away from freeze-thaw cycles keeps repairs to a minimum.
- Regular Cleaning: Twice a year brushing and rinsing wards off buildup and catches early signs of trouble before they turn into bigger problems.
- Routine Inspection: Checking for signs of rust, cracks, or peeling paint once in spring and again before winter means I can jump on small fixes early.
- Level Ground: Placing statues on even, dry ground helps prevent tilting, stress cracks, or breaks after heavy rain.
If possible, I try to avoid having heavy branches or overhanging trees above statues, since falling limbs and bird droppings add to the cleanup and repair jobs.
Extra Pointers From My Own Experience
I sometimes come across quirky issues, like statues that attract lots of birds or ones set in shady spots that get slick with moss. A few bonus tips I’ve learned:
- Moss and Algae Removal: A diluted vinegar solution or gentle scrubbing with baking soda and water can clean stubborn patches without harming most statue materials.
- Paint Bleed or Flaking: When spray painting, thin even coats work better than heavy ones that run or flake later. Waiting for each coat to dry avoids sticky messes.
- Cementing Bases: For statues that tip easily, cementing just the base with a patch of concrete or landscape adhesive keeps everything upright through storms and strong winds.
- DIY Touch-Ups: Keeping leftover paint samples or small tubes of matching outdoor paint on hand can make fast work of chipping and scrapes as they happen.
Every garden statue seems to have its own personality, so these small fixes reflect the care put into each restoration. Planning for a little regular maintenance saves a lot of time compared to full repairs down the line.
Common Questions About Garden Statue Restoration
There’s always something new to learn, and I get asked certain questions a lot:
Question: What’s the best glue for fixing a broken garden statue?
Answer: For concrete or stone, outdoor-rated epoxy is my top pick. For resin, two-part plastic epoxies work best. Always check that it’s made for outdoor use and can handle the statue material you’re fixing.
Question: Can I use household paint on my garden statue?
Answer: I wouldn’t. Indoor paints fade or peel really fast outside. Exterior-grade acrylic paint or spray paint specifically labeled for outdoor use holds up way better to sun, rain, and freeze-thaw cycles.
Question: Should I move statues inside for winter?
Answer: If it’s easy to do, I recommend it for resin, lightweight, or detailed statues. Heavy stone or metal statues usually do fine outside if they’re on a dry, well-drained base and regularly sealed.
Question: How do I get rid of tough mineral stains?
Answer: Try scrubbing with a paste of baking soda and water, or use a specialty stone cleaner. Always rinse thoroughly and test a small hidden spot first to avoid damaging the finish.
What Materials and Tools Should I Have Handy For Garden Statue Restoration?
Having a simple restoration supply kit speeds up repairs. In my own shed, I keep these supplies for quick fixes:
- Stiff wire and softbristle brushes
- Mild dish soap, white vinegar, and baking soda
- Outdoor-rated epoxy (for stone, cement, and resin)
- Epoxy putty (for shaping missing corners or filling gaps)
- Fine grit sandpaper or sanding sponges
- Primer and outdoor acrylic paint
- Clear matte or satin sealant spray
- Disposable gloves and a dust mask
- Plastic drop cloth and painter’s tape for mess-free painting
Most of these products are easy to find at hardware or craft stores, and they don’t take up much space. Keeping them on hand means I can deal with any surprise chips, cracks, or scrapes right away. And if I need to, I can ask staff for tips or suggestions for tricky repairs; store pros are usually ready to point me in the right direction.
Giving Garden Statues a New Life
Restoring garden statues is about preserving memories and adding character to outdoor spaces. Even statues that look beyond repair can surprise you with a bit of care and time spent on cleaning, patching, and painting. Regular upkeep goes a long way, and every restoration becomes a fun story to share with fellow gardeners and visitors. Saving weathered garden art is a rewarding project that blends both creativity and practical know-how. With a little patience and attention, anyone can tackle this project and watch their garden come alive with revived character and charm.
The vinegar-and-water solution for lichen removal is such a simple but effective tip—it’s refreshing to see eco-friendly methods that won’t damage older stonework. Your warning about pressure washers being too harsh makes perfect sense; I’d never considered how they could drive moisture deeper into porous materials.
The step-by-step guide to repairing small chips with mineral pigments makes me wonder: do certain types of stone (like marble vs. limestone) require completely different patching techniques? The seasonal maintenance checklist is gold—especially the note about winterizing statues in freeze-thaw climates.
I’m so glad you picked up on the eco-friendly angle! It’s amazing how often the “old-fashioned” solutions, like vinegar and water, are actually the most gentle and effective for historic materials. And yes—you nailed it about different stones. Marble, for instance, is denser and less porous, so patching tends to hold better with fine-ground marble dust mixed into a binder, whereas limestone is softer and often calls for a more breathable filler that can move with the stone. Think of it like tailoring a suit—you wouldn’t stitch silk the same way you’d stitch wool!
And I’m thrilled you found the seasonal checklist useful. Freeze-thaw really is the secret villain in outdoor stonework—one unnoticed crack in autumn can turn into a full-blown fissure by spring. A little preventive care in the fall can save a statue decades of wear.