Restoration work is a rewarding way to breathe new life into neglected items, whether it’s furniture or a cherished vintage object. If you’re a novice, starting your restoration journey might seem overwhelming, but understanding the basics can help you gain confidence and skill. In this article, I share my beginner-friendly guide on tools, paints, and techniques to help you get started in the restoration world.
Essential Tools and Materials for Restoration Beginners
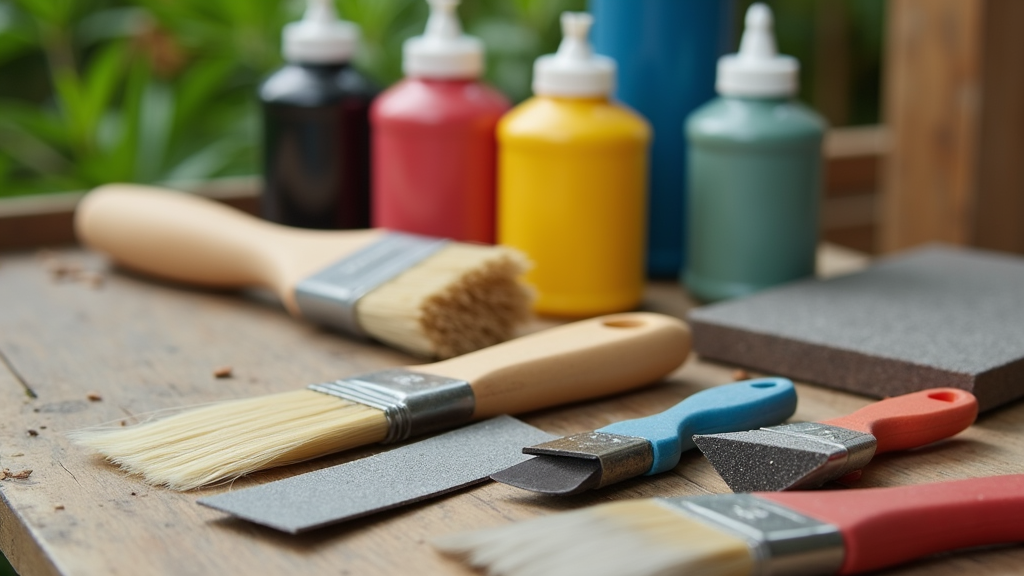
Restoration work relies on having the right tools and materials to achieve a quality finish. When you start out, it pays to invest in basic equipment. This often means tools like sanding blocks, brushes, putty knives, and, of course, the proper paints and solvents. I’ve found that having a solid set of tools sets the stage for successful projects.
Many beginners underestimate the importance of proper supplies. Whether you are tackling wood furniture, metal fixtures, or other antiques, choosing the right type of tool and finish is super useful. A small upfront investment in quality products can lead to better results and fewer headaches down the line. In addition, understanding the nuances between different materials will help you decide when to use a fine grade of sandpaper or when to opt for a more robust cleaning solution.
For instance, learning which paints work best on wood versus metal can save time and effort. Tools such as small brushes with varied bristle sizes, precision knives, and even speciality adhesives can make your work look neat and professional from the start. Over time, as you gain experience, you might choose to add more specialized tools to your arsenal. This wise investment early on can greatly cut down on trial and error as your restoration projects get more complex.
Getting Started with Restoration Projects
The restoration process starts with understanding what you want to restore and why. Before jumping into a project, it’s a good idea to do some homework. Look at restoration projects similar to your planned endeavor to see what tools and techniques were used. Spending some extra time researching will give you confidence in your approach and help you avoid common pitfalls.
Learning the history behind the object can also provide motivation and context for the work. Often, the story behind an old piece of furniture or decor can inspire you to preserve its legacy. In my experience, even a basic overview of the object’s design period or typical construction methods can help guide the restoration process. This historical context not only provides inspiration but also informs the techniques you choose to use.
Beyond the historical context, it’s important to remain flexible. Every restoration job presents its own unique challenges, and conditions can change from one project to the next. Start small, and don’t be discouraged if your first project isn’t a masterpiece. Each project offers a learning opportunity that builds your skills over time, allowing you to experiment and gradually improve your techniques.
Step-by-Step Guide to Kick Off Your Restoration Journey
Taking on a restoration project for the first time can feel like a big leap. Here is a practical, step-by-step guide I often follow to kick things off:
- Assess the Item: Begin by closely examining the object you plan to restore. Check for structural damages, old finishes, and other areas that might need special attention. A careful inspection can help you map out the work ahead.
- Research and Plan: Look up similar restoration projects online or in books. Gather information on the type of paint or finish that will work best for your piece. This research will act as a foundation for your project.
- Gather the Tools and Materials: Assemble the tools you need such as sandpaper, brushes, and paints. I always find it handy to choose products that suit the project’s material, whether it be wood, metal, or fabric. This planning stage is essential to ensure a smooth workflow.
- Prepare Your Workspace: A clean, well-lit workspace minimizes mistakes. Lay out protective coverings on surfaces so that spills or splatters are easier to clean up. Creating a dedicated area for your work can also boost your motivation and productivity.
- Follow Safety Practices: Always wear protective gear like gloves and masks when dealing with paints or solvents. Safety is very important when handling chemicals or sharp tools, so never take shortcuts in this area.
- Work Slowly and Steadily: Take your time during each process, from sanding to painting. Rushing can lead to errors that might damage the piece further. A slow, steady approach pays off in the long run as it minimizes costly mistakes.
- Evaluate and Adjust: Once you have applied the first coat, step back and assess your work. Sometimes a project may require additional layers or minor corrections to achieve the desired finish. Don’t hesitate to take breaks and return with fresh eyes to spot any issues you might otherwise miss.
This methodical approach minimizes errors and helps you build confidence as you see progress step by step. Each project reinforces your skills and teaches you nuances that will be crucial for more challenging restorations in the future.
Common Challenges and Considerations in Restoration Work
Like any craft, restoration comes with its own set of challenges. Being aware of common pitfalls can help you prepare for issues that may arise along the way. Sometimes, even with careful planning, unexpected hurdles can show up, but they can all be worked through with patience and determination.
- Material Compatibility: Different surfaces react differently to various types of paint and sealants. It’s important to choose products that are designed for the specific material you are working with, as this can prevent future deterioration.
- Wear and Tear Over Time: Old items might have layers of previous finishes, dust, or damage that require extra work to remove. Taking the time to properly strip the piece down before restoration is often very useful. This step might seem tedious, but it sets the foundation for a better finish.
- Environmental Factors: Temperature and humidity can impact how effectively paint adheres to a surface. If you’re working in a workspace without climate control, be prepared for some trial and error. Adjusting your methods according to environmental conditions can save you a lot of trouble down the road.
- Legal and Safety Regulations: Depending on your location, certain restoration materials may be subject to local safety guidelines. Familiarize yourself with these regulations to avoid potential legal or health issues while you work.
Material Compatibility
Materials like wood, metal, or ceramic each have their own requirements when it comes to restoration. I always start by testing a small area with the chosen product to see how well it adheres and dries. Since not all materials react the same way to every type of paint or sealant, small tests can help avoid larger mistakes later on.
Dealing with Old Layers and Residue
Old finishes can be tricky to remove completely. In many cases, you might need to use chemical strippers or careful sanding techniques. It is important to be patient and methodical during this process. Rushing can create more damage or lead to uneven surfaces that require additional work later on, so take extra time to get it right.
Managing Environmental Impacts
I have learned that working in the right environment makes a big difference. For example, if the temperature is too low, certain adhesives or paints might not cure properly. Conversely, too much humidity can slow the drying process or cause bubbling in the finish. Checking your workspace’s conditions before you begin can help you adjust your methods for the best possible outcome.
Staying Up to Date on Safety Guidelines
While restoration work is fulfilling, it does involve chemicals and tools that can be hazardous if not used properly. Staying updated on the latest safety guidelines or product updates is very important. Proper ventilation, protective gear, and following manufacturers’ instructions are practices that I always adhere to. It is crucial to check these occasionally, as new information may emerge, ensuring you keep your workspace as safe as possible.
Remember, every challenge in restoration work is manageable with the right preparation and mindset. Being aware of these issues from the start can help prevent frustrations and setbacks during your projects.
Advanced Techniques and Methods
Once you feel comfortable with the basics, trying out advanced techniques is an exciting next step. With a little extra effort and focus, you can achieve a more refined and artistic result in your projects. Experimenting with different methods can really open up new possibilities in your work.
Mastering Patina and Layering: In some restorations, showcasing a bit of history adds character. Experimenting with patina techniques can give items an aged, authentic look while still preserving their structure. I often use layered paints and gentle distressing methods to create a soft, genuine feel to the piece. This gives even a simple restoration a personality of its own.
Refining Surface Details: Fine details such as edges and intricate carvings require extra attention. Taking the time to carefully work with small, soft brushes or specialized detail tools can transform ordinary surfaces into true works of art. Practice is key here; the more you work on these details, the more precise and confident you will become.
Optimizing Finish With Sealants: After painting, applying a good quality sealant protects your hard work. Sealants not only give a boost to the look of the finish but also extend the longevity of the project by protecting against moisture and wear. Spending a little extra time on this final step can really pay off in the durability and beauty of your restoration.
While these techniques may seem advanced, practicing on small sections and experimenting with scrap materials will gradually improve your skillset. With each project, you learn new ways to refine your approach and take your restoration results up a notch.
Project Ideas: What Should Beginners Try Restoring?
If you are wondering where to put your newfound skills to the test, consider starting with projects that offer a balanced mix of challenge and reward. Many beginners try smaller items at first, which allow for experimentation without the fear of irreversible damage. Starting small provides a low-risk way to practice while still offering tangible, satisfying results.
Small wooden furniture like chairs or side tables can be a great starting point. These items typically don’t have too many intricate details, making them easier to sand, paint, and refinish. Another great project is restoring decorative items like picture frames or mirrors. These projects offer a wonderful introduction to the world of restoration and allow you to build confidence gradually.
Focusing on these smaller projects lets you build techniques and confidence before moving on to larger and more complex restorations like antique cabinets or intricately carved wooden pieces. Each project teaches practical lessons on material handling, color mixing, and finishing techniques that are invaluable as you progress.
- Furniture Restoration: Revamping a worn-out chair or table provides a very important sense of accomplishment. These projects also reveal the nuances of working with wood and paint, allowing you to slowly build up your expertise.
- Decorative Item Rejuvenation: Restoring items like vintage picture frames or small sculptures lets you experiment with detail work and creative finishes. The process of breathing new life into these pieces can be deeply satisfying, as each item tells its own story.
- Upcycling Projects: Sometimes, mixing restoration with upcycling creates unique decorative items. Transforming an old, forgotten object into a vibrant piece of art is both fun and creatively challenging. These projects encourage you to think outside the box and find beauty in unexpected places.
Additional Restoration Tips and Tricks
Along with the basic steps and advanced techniques, there are many little tips and tricks that can make your restoration projects even more enjoyable and successful. For example, keeping a detailed project journal helps you track your progress, note which products worked best, and remember lessons learned. Over time, this journal becomes a treasured resource, full of practical advice tailored to your personal experiences.
Another tip is to experiment with different textures. Sometimes mixing a matte finish with a semi-gloss over certain areas can create an eye-catching contrast that elevates the overall appearance of the piece. It might seem like a small detail, but these subtle adjustments can truly transform a simple restoration into a standout piece.
It is also very important to clean your tools regularly. Cleaning not only extends the life of your equipment but also ensures that residual materials do not interfere with new applications. A little cleaning goes a long way in maintaining consistent and high-quality results throughout your projects.
Furthermore, networking with other enthusiasts can be extremely beneficial. Joining online communities or local workshops offers opportunities to swap ideas, troubleshoot challenges, and get inspired by others’ work. Sharing experiences and tips can help foster a supportive environment as you continue to build your skill set.
Frequently Asked Questions
I’ve often encountered common questions when discussing restoration with fellow enthusiasts. Here are a few that I find really helpful:
Question: What is the best way to learn basic restoration techniques?
Answer: Start by working on small, simple items. Read detailed guides and watch tutorials that focus on proper preparation, sanding, and finishing techniques. Practice is the best way to build confidence, and every project adds a valuable lesson.
Question: Are expensive tools necessary for beginners?
Answer: Not at all. Many basic projects can be accomplished with affordable tools that still produce good results. Once you master the basics, you may gradually upgrade your tools for higher efficiency or precision.
Question: How do I choose the right type of paint or finish?
Answer: The choice depends on the material you are restoring. For example, wood requires a different type of paint compared to metal. Conducting a small test patch can help you decide on the best product for your specific project.
Final Thoughts
Starting a restoration journey begins with a mix of passion, patience, and the right knowledge. When you equip yourself with essential tools like sanding materials, specialty brushes, and a variety of paints, you pave the way toward successful restoration projects. I’ve found that every project, no matter how small, comes with its own set of lessons and rewards. It isn’t just about fixing an old chair. It is about reconnecting with the history behind an object. It is about transforming it into something new and personal. The process teaches you valuable skills that extend well beyond the project itself.
This guide is meant to be a practical resource, filled with tips, step-by-step instructions, and insights that will help you build your confidence and competence as you work on restoration projects. Remember that progress comes with practice, and every project is a stepping stone toward mastering more complex techniques. Take the time to plan carefully, work steadily, and always be open to learning.
There’s a deeply fulfilling sense of achievement when you witness a neglected piece come back to life. So, grab your tools, pick a small project to kick off your restoration adventure, and keep experimenting with new methods. With every new creation, you’ll notice your skills grow, and endless possibilities will open up in the world of restoration. Enjoy every moment of the process, and let your creativity and perseverance shine through.
Wrapping up, restoration isn’t just a task you complete—it’s an evolving journey that enriches your understanding of craftsmanship and history. Every step you take builds both your skill set and your appreciation for the art of renewal. So go ahead, get involved, and let your passion for restoration guide you to many more successful projects in the future.
This was such an informative and encouraging read for anyone looking to get into restoration work! I really liked how you broke down not just the tools and steps, but also touched on the emotional and historical connection we often have with old pieces. It made the whole process feel more personal and meaningful. I’m especially inspired to try my hand at restoring an old picture frame I’ve had lying around. One question though—how do you decide whether a piece is worth restoring or better left as-is to preserve its authenticity?
Hi Kavitha
Thank you for that wonderful comment . Sorry I didn’t respond sooner I have been busy building my wife a greenhouse. Your question on how to decide whether a piece is worth restoring or better left as-is depends a lot on your feelings about the piece if it’s like a family air loom or an antique I think it would best to leave it as is to preserve its authenticity.
There are products you can use that will bring it back to it’s original look. I have not done this type of restoration yet I plan on doing some research in to this.
Have a great and wonderful day
Richard