
 Wood garden art adds a lot of personality to outdoor spaces, but after a few seasons in the sun, rain, and wind, even the toughest pieces start to fade and break down. Loading up your garden with beautiful wooden sculptures, signs, or birdhouses comes with the reality that they’ll eventually show some wear. Thankfully, bringing these pieces back to life isn’t as tough as it might seem; you just need the right approach.
If you’re noticing your favorite outdoor wood art looking gray, splintered, or a bit dull, you’re definitely not alone. Almost every garden lover has run into the struggle of keeping wooden decorations looking their best year after year. The cool part is that a bit of hands-on care can really transform even the most tiredlooking pieces and help them last much longer.
I’m breaking down some of my go-to techniques for restoring weathered wood garden art, along with a few tips that can help you keep those unique accents bright and sturdy for seasons to come. Whether you’re new to wood restoration or already have a few projects under your belt, there’s plenty here to help you refresh your garden art without a ton of hassle. So, let’s jump into it and see how you can make your garden décor stand out again.
1. Inspect and Prep: Start With a Solid Foundation
The first step to restoring any wood garden art is taking a good look at its current condition. You want to figure out what sort of damage you’re working with. Cracks, peeling paint, loose nails, and rot all call for different fixes.
- Give the piece a once-over: Make sure to look for soft spots that could mean rot, as well as any hardware that might need tightening or replacing.
- Clean off the grime: I usually use a mix of mild soap and water, paired with a sponge or soft brush, to get rid of dirt, moss, or algae before moving forward.
- Let it dry out: Never start restoration work on wet wood; let it dry out fully so you don’t trap moisture under finishes or repairs.
What to Do With Deeper Damage
If you spot rotten areas, it helps to dig out the soft wood and, for smaller spots, fill with an outdoor wood filler. If big chunks are missing, you may need to replace a whole section (like swapping out a broken birdhouse roof). Prepping the surface is super important; a clean, dry start makes all later steps work better.
Don’t forget to lay out your work area and work in a place with good ventilation, especially if you plan to use strong-smelling finishes or glue. This small step makes the job safer and a lot more comfortable.
2. Sanding: Smooth Away Age and Splinters
Weathered wood often ends up rough, splintered, or covered in old paint that’s peeling. Sanding takes care of all of that fast. I reach for mediumgrit sandpaper to knock off anything loose, then switch to a finer grit for smoothing things out.
- Sand by hand or use a sander: For larger flat surfaces, a palm sander saves time. Smaller or intricate details usually need some elbow grease with a sanding sponge or block.
- Focus on tricky spots: Pay attention to corners, edges, and carved details; they trap more grime and need a gentle touch.
Sanding not only makes the surface look better but helps any new finish or paint stick way better. Just remember to wear a dust mask, especially if you’re sanding older painted wood, since old finishes can produce fine dust you don’t want to breathe.
If you have multiple decorations to work on, try grouping the sanding process. This helps speed things up and lets you apply finishes to several pieces at once later on.
3. Repairs: Fixing Cracks, Holes, and Loose Bits
Once the wood is clean and smooth, it’s time to patch up any issues. Splits, cracks, or holes can be filled with an exterior wood filler. I like to go for the kind that’s paintable and specifically made for outdoor use; these hold up well through temperature swings and rain.
- Fill with wood putty: Press putty or wood filler into cracks, then sand flush after it dries. For really deep or wide cracks, two applications work better than one thick layer.
- Replace weak hardware: Screws, hinges, and nails can rust out over time. Swap these out for stainless steel versions that handle weather a lot better.
- Glue loose joints: If parts are wobbling, a dab of waterproof wood glue and a clamp will usually set things right again.
Taking the time to make repairs means your garden art not only lasts longer but also keeps its original charm and function. Nobody wants a lopsided garden gnome or a birdhouse that won’t stay shut. When in doubt, ask at your local hardware store for outdoor-specific products—they’ll know what holds up best in your climate.
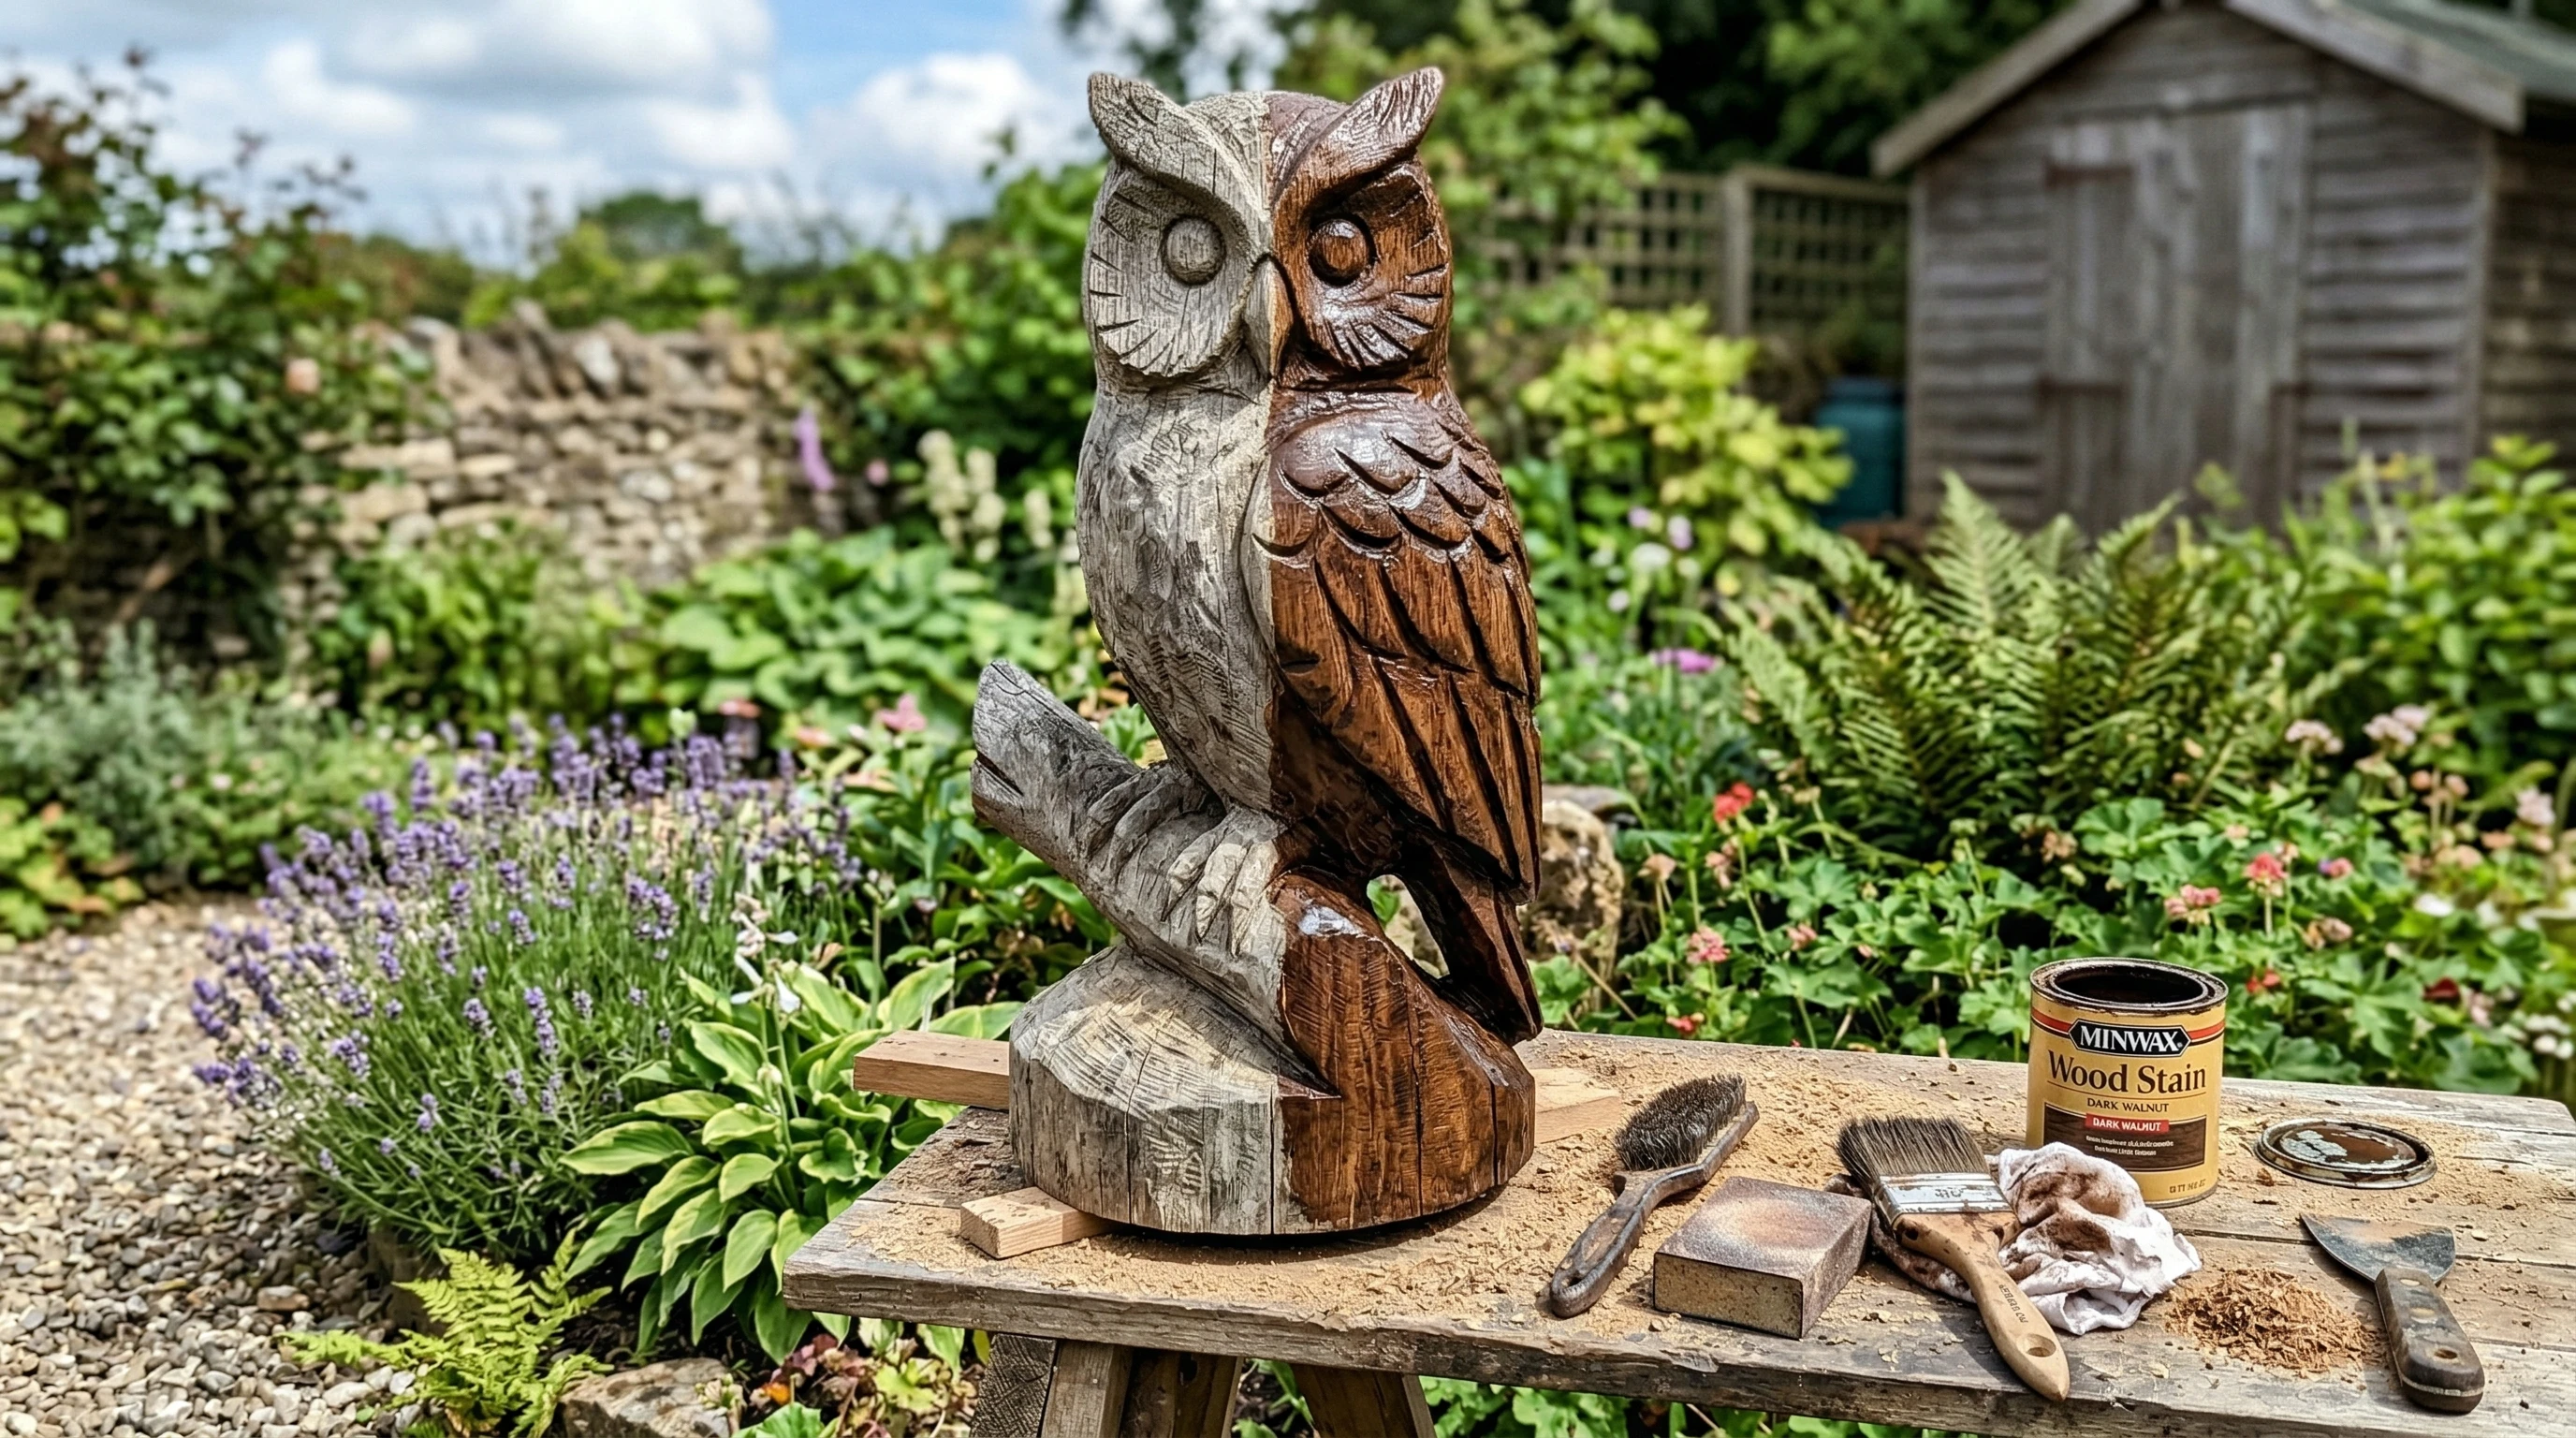
4. Restoring Color and Character
Exposure to sunlight and rain drains the rich color from wood. Restoring that fresh, lively look is usually my favorite part. Depending on the style you like, you can go with stain, paint, or a natural look. Don’t be afraid to experiment a little—sometimes a brand-new color or finish can totally change the vibe of a piece and give your backyard a whole new feel.
Refreshing With Stain
- Choose an exterior stain: Stain highlights the wood grain while bringing back lost color. Waterbased stains dry fast and are easy to clean up.
- Apply with a brush or rag: Work with the grain of the wood. Let the stain soak in and wipe off any excess, usually after 5-10 minutes.
- Layer for deeper color: Multiple thin coats work better than piling on too much at once.
Going Bold With Outdoor Paint
- Use weatherproof paint: Exterior acrylic or spray paints handle the elements well. Primer first, then color, then a clear sealer keeps everything fresh.
- Bright colors pop: Birdhouses and whimsical garden art look great with bold shades.
Clear Sealers For a Natural Look
- Penetrating oil or spar urethane: Both protect against water and UV but keep the look natural. Apply with a clean brush and let dry fully between coats.
No matter what you pick, always follow the manufacturer’s instructions for outdoor durability; that’s what helps those finishes last when the weather turns wild. If you want to add some extra eye-catching details, try stenciling on a design or using a metallic paint accent for nextlevel cool garden art that reflects your style.
5. Weatherproofing: Keeping Your Work Safe
Once you’ve restored the look of your artwork, it’s really important to protect it. UV rays, rain, snow, and temperature swings are tough on outdoor wood, so a strong topcoat can make a big difference.
- Pick the right clear finish: Marine varnish, spar urethane, or specially formulated outdoor polyurethanes help block moisture and sun damage.
- Seal every surface: Don’t skip on the backs, bottoms, and undersides; these hidden spots soak up moisture too.
- Reapply each season: For the best long-term results, give your art a quick check each spring and add a fresh layer of protection as needed.
Sealing your art keeps the wood from soaking up water and fading, so you can enjoy your handiwork way longer. If you live where winters are harsh, consider storing prized pieces inside during cold months; it helps them last for many more years.
6. Extra Tips For Keeping Garden Wood Art Looking Good
- Choose the right placement: Moving pieces to less exposed areas (like under a tree or overhang) helps protect from the harshest sunlight and rain.
- Raise up when possible: Place art on stones, bricks, or short stands instead of directly on the ground; less ground contact means less risk of rot and damage from moisture.
- Quick seasonal checkups: Give your wooden art a fast inspection at the start and end of the growing season to spot any issues early.
- Switch things up for fun: Rearranging your garden art from time to time not only keeps the look fresh but also helps balance wear and tear.
It’s also a nice touch to write the date of each restoration on a hidden spot. This little tradition adds history to your piece and lets you see how often your art gets some TLC.
Bringing Your Garden Art Back to Life
Restoring weathered wood garden art feels rewarding and keeps your outdoor space looking fun and welcoming. The mix of cleaning, sanding, fixing, refinishing, and sealing isn’t too complicated once you break it down, and it means those cute signs and statues can bring joy for years, not just one season. Keeping up with a little routine care will save you time and money in the long run, and it’s a great way to add your own memory and history to your backyard space. If you have a special piece that’s seen better days, it’s definitely worth the effort to freshen it up and show it off again. Bottom line, taking the time to fix up and protect your garden art keeps your outdoor area feeling lively and personal, all while making sure your favorite pieces last for the long haul.