
Antique restoration is a hobby that mixes creativity with some hands on fixing and problem-solving. When I first started out, the amount of tools out there looked pretty overwhelming. It turns out you only really need a solid set of basic tools to begin breathing new life into old treasures. Gathering these essentials makes it much easier to get good results, even as a newbie.
Why Having the Right Tools Helps Beginners in Antique Restoration
Antique restoration is about turning back the clock on furniture, decor, and family heirlooms so they can shine again in the present. Sometimes, you just want to clean up a surface, fix a minor scratch, or tighten up wobbly parts. Having reliable beginner tools in hand removes a lot of guesswork and helps avoid accidental damage, something I learned the hard way early on.
Antique pieces often use older styles of wood joinery, original hardware, and finishes. Modern shortcuts and power tools can sometimes make things worse for fragile items that have survived decades. That’s where restoration specific gear comes in handy. It’s about working gently and patiently, using the right approach for each piece’s age and construction. Building up your toolbox carefully gives you the confidence to handle antiques with care and get satisfying results.
Getting Started: Core Tools Every Beginner Restorer Needs
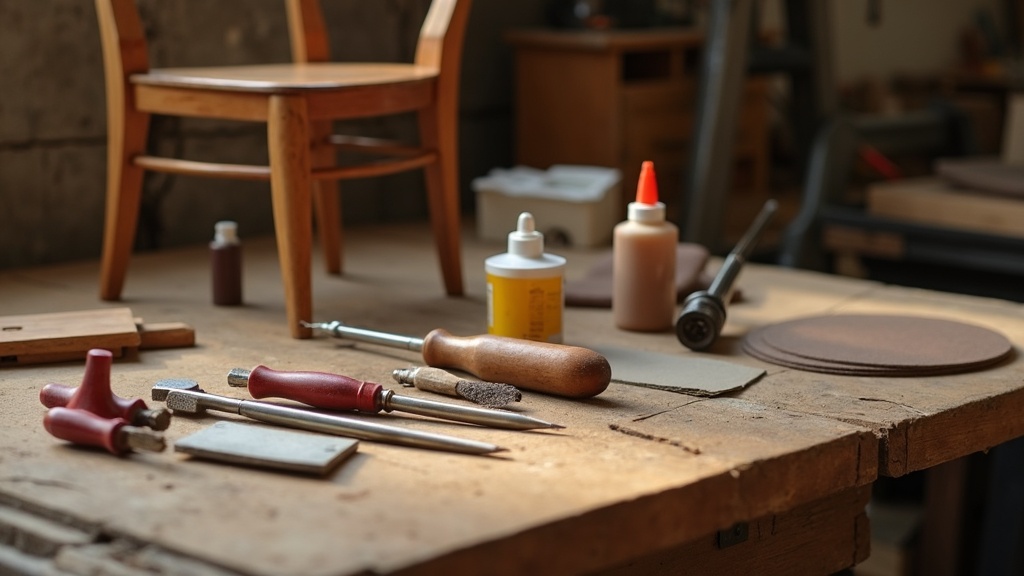
You don’t need a full workshop to get into antique restoration. Here are my go to picks that will help pretty much anyone starting out:
- Screwdrivers (Flat and Phillips): Many older pieces have rusty hardware. Having more than one size on hand keeps you ready for anything.
- Claw Hammer and Rubber Mallet: The hammer is good for nails and careful tapping; the rubber mallet is perfect when you don’t want to dent delicate wood.
- Needle Nose Pliers: Super useful for gripping and removing tacks or tiny pins, especially on chairs and drawers.
- Assorted Sandpaper (Grain 80–220): I suggest getting several grades. Finer grits smooth finishes; coarse grits tackle old paint or tough grime.
- Putty Knife: This handy tool helps spread wood filler or gently remove old finish layers without gouging the wood.
- Wood Glue (PVA or Hide Glue): These are ideal for furniture repairs and keeping things period appropriate if you want to stick with tradition.
- Painters Tape and Soft Cloths: Tape off areas as you work and use microfibre cloths for dusting or applying stains and waxes.
Simple Steps to Begin Antique Restoration with Basic Tools
Starting small goes a long way. When I was learning, these steps helped me move forward without feeling overwhelmed:
- Inspect Carefully: Before you begin, take a close look. Figure out what’s loose, scratched, chipped, or just dirty. Photos help track your progress and guide your repairs.
- Clean Surface Dirt: Use a mild soap solution and soft cloth to get rid of any surface grime. Stay away from harsh cleaners, as they can mess up old finishes or hide mistakes.
- Fix Simple Joints: Use wood glue and clamps (even simple hand pressure or books work in a pinch) for wobbly chair legs or arms.
- Light Sanding: Start with fine sandpaper to smooth rough spots. Always sand with the wood grain and check your work as you go. It’s better to go slow and stop if the old finish starts to come off too quickly.
- Retighten Hardware: A good set of screwdrivers will help you update or replace rusted or missing screws safely.
Working step by step also lets you ask questions and get advice if you’re ever unsure, helping you keep mistakes to a minimum as you build up your skills.
Things to Think About Before Picking Up Your First Restoration Project
Starting a new skill feels really exciting, but it pays to think ahead. Here are a few common beginner challenges, with some quick tips for managing them:
- Wearing Protective Gear: Fine dust and old finishes can be a nuisance. Wearing a basic dust mask and safety glasses is a smart move, especially if you’re sanding or working with solvents.
- Identifying Original Finishes: Know what you’re working with: Is it shellac, lacquer, polyurethane, or wax? Sometimes just a little cleaning brings a finish back to life, so test tiny patches first.
- Stabilizing Weak Parts: If a piece wobbles or has soft wood, fix stability first. Don’t add heavy cleaners or start sanding until it’s sturdy and safe to work on.
- Work Space and Lighting: Good lighting makes a big difference. Make sure your work area is tidy and well lit so small hardware doesn’t get lost and repairs are easier to spot.
Wearing Protective Gear
A lot of old dust and broken finishes can irritate your skin or lungs. I keep gloves and a dust mask close by, and I always clean up my workspace right after finishing for the day. Even basic protection makes a big difference, especially over time.
Identifying Original Finishes
Some old furniture pieces have finishes that can react differently when cleaned or sanded. Testing a hidden spot with rubbing alcohol (for shellac) or lacquer thinner (for lacquer) can help you figure out what’s there, so you know which cleaners or polish to use.
Stabilizing Weak Parts
Always check for wobbly legs, arms, or joints. Prioritize gluing or clamping those areas first because a strong structure is the safest base before you start refinishing or decorative work.
Work Space and Lighting
I set up my space using strong lamps and a big drop cloth to keep things clean. This makes detail work easier, and helps protect both the piece and your floor from accidental spills or drops.
Pacing yourself is the best way to make progress and avoid frustration. Even if you just repair one chair or tidy up a small table, having your starter tools always within reach makes projects feel more enjoyable and a lot less stressful.
Tips and Tricks to Build Confidence as You Restore
As you get comfortable with simple projects, you’ll want to try a few extra techniques to boost your results:
Try Restoring in Layers: Work on one surface at a time. This keeps things organized and makes troubleshooting much easier if you hit a snag.
Use Gentle Cleaners Before Deep Work: A soft sponge and gentle soap can help avoid unnecessary sanding or stripping. Old finishes sometimes spring back to life with simple cleaning and waxing.
Read the Piece’s Story: Look for construction details or marks to spot any previous repairs. This helps you match old materials and use the right fixing techniques for age and style.
Learning to take it slow and pay attention to small details, like matching wood grain or choosing the right fill for scratches, makes for much more satisfying before and after results, and you’ll be less likely to overdo things.
The Most Useful Beginner Tools and Their Purposes
The list below includes tools I rely on regularly, with a quick note on how each helps out in common situations:
- Small Vise or Clamps: Used to hold pieces together while glue dries.
- Wood Filler/Stain Marker: Helps fix scratches, dings, and fill tiny holes for a smoother finish.
- Finishing Wax or Oil: Adds shine and a bit of protection after you’ve cleaned and sanded a piece.
- Chisels (¼” and ½”): Handy for removing glue from joints or fitting new hardware parts into old slots.
- Tack Puller: Lets you get antique upholstery tacks out without marring the surrounding wood.
As you try out more projects, you’ll get a feel for when you might want to upgrade to specialty tools, but this beginner set gets the job done for most tasks. Plus, as you build your toolkit, you’ll develop your own list of trustworthy favorites that suit the unique pieces you tackle. Don’t hesitate to adapt and add based on what you stumble upon in your projects—restoration work is as much about problem-solving as it is about standard procedures.
Frequently Asked Questions
Here are a few of the top questions I get from folks new to antique restoration:
Question: Is it safe to use modern wood glue on old furniture?
Answer: Yes, most PVA wood glues are safe and offer a strong bond, but some restoration purists prefer hide glue, especially if they want repairs to be reversible.
Question: How do I avoid damaging the original value?
Answer: Focus on cleaning and stabilization before you start stripping or refinishing. Gentle repairs save original patina and keep value higher. Always test any product on a hidden spot first.
Question: What’s the best beginner project?
Answer: Small side tables, footstools, or plain wooden chairs are all good bets. They’re usually simple to fix and a great way to build up skills without too much risk.
Start Your Antique Restoration Adventure with the Right Tools
Getting into antique restoration only requires a practical toolset and some patience. Basic equipment like screwdrivers, clamps, and sandpaper covers most small repairs. As you practice, you’ll get better at spotting what each piece needs and learn how to use your tools in new ways. Take your time, trust the process, and you’ll see even simple fixes bring new life into old favorites. Whether you’re revamping a family heirloom or scoring flea market finds, the right starter tools are the perfect way to jump in and enjoy the ride of uncovering the beauty of antiques
**Here’s a little transparency: Our website contains affiliate links. This means if you click and make a purchase, we may receive a small commission. Don’t worry, there’s no extra cost to you. It’s a simple way you can support our mission to bring you quality content.**
This was such an encouraging read—I like how you broke antique restoration down into approachable steps instead of making it feel intimidating. The reminder to start with simple projects and focus on cleaning and stabilizing before diving into heavy refinishing really stood out to me. I also appreciate the practical tool list—it feels doable without needing a full workshop. One question I have is: if you’re on a tight budget, which single tool would you say makes the biggest difference for beginners just getting started?
Hey there! If you’re new to the world of yard ornament restoration, allow me (Richard) to roll out the welcome mat—and maybe dust it off while I’m at it. Welcome, welcome to yard ornament restoration! It’s a hobby where chipped angels get their halos back, garden gnomes regain their swagger, and concrete critters stand tall again. You’ll find it’s equal parts art, patience, and detective work—but the payoff is a backyard full of personality (and bragging rights). Glad to have you join the fun!✨
I’m so glad you found the breakdown encouraging—that’s half the battle, right? Antique (and yard ornament) restoration can look like some secret wizard craft, but really it’s just about patience and the right starting point.
As for your question: if you’re on a tight budget and want just one tool that pulls the most weight, I’d say go with a good set of nylon and brass brushes. ✨ Why? Because almost every project—whether it’s stone, concrete, or metal—begins with cleaning and surface prep. A brush set lets you whisk away dirt, moss, old paint flakes, and rust without doing damage, and suddenly your “lost cause” piece looks 10 years younger. It’s like giving your statue or gnome a spa day before any deeper work.
Everything else—sealants, paints, even adhesives—works so much better after a solid scrub. Think of it as the “magic wand” for beginners.
Here’s a simple, budget-friendly starter kit (under $25) that complements your nylon and brass brushes—and gives you a solid foundation for restoration projects without needing a full workshop:
Versatile bristle types on a budget MAXMAN 6‑Piece Wire Brush Set (Stainless, Brass, Nylon) – ~$24 $24.33 Zee Booth Compact, travel‑friendly detail cleaning Lincoln Electric 3‑Piece Mini Wire Brush Set – ~$8 $8.00Canada Welding Supply Inc. Ask about this Chat GPT chooses products independently. Learn more
Featured Picks
MAXMAN 6‑Piece Wire Brush Set (Stainless, Brass, Nylon) – ~$24
This set covers fine nylon, brass, and more aggressive stainless steel brushes—allowing you to clean delicate surfaces, remove rust, and handle tougher grime all in one kit. At about $24, it fits your budget while layering nicely with your existing brush set.
Lincoln Electric 3‑Piece Mini Wire Brush Set – ~$8
Handy for small details and tight spots, this compact set—including brass, stainless, and nylon bristles—packs portability and precision while leaving plenty of budget room for other essentials.
Extra Budget-Friendly Essentials (based on restoration expert advice)
According to hands-on experience from restoration enthusiasts:
“All you need is some kind of rust remover and sandpaper for cheapest. Wire-wheel for an upgrade.”
“Start small… just get the stuff you need for the thing you’re working on and build up.”
Reddit+1
With that in mind, here are affordable essentials under $5 each that pair well with your brushes:
Item Approx. Price Why It’s Handy Medium & Fine Sandpaper$1–$3 per sheet Smooths surfaces and removes old finishes prior to cleaning. White Vinegar