
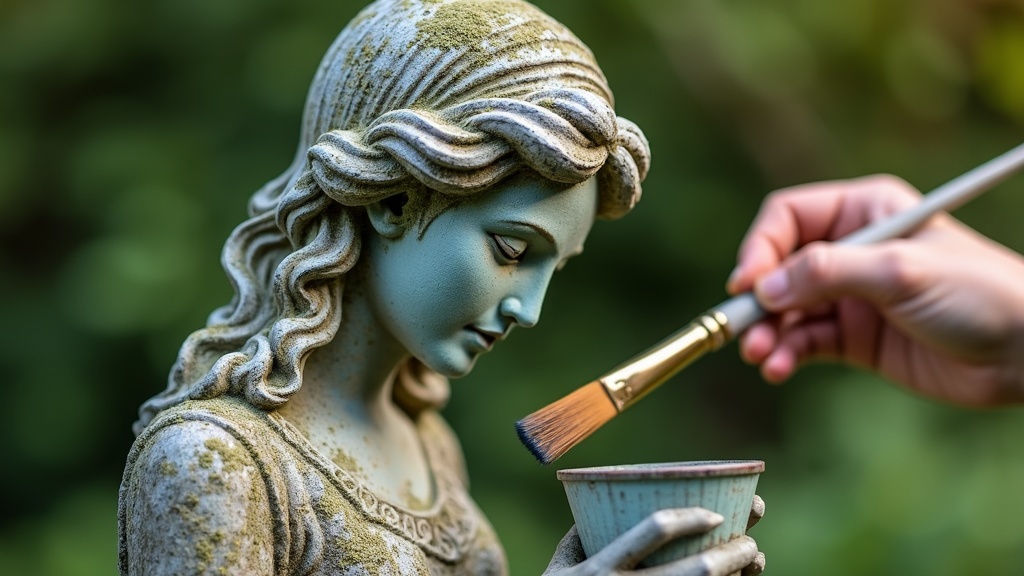
Matching fresh paint to weathered garden statuary isn’t always straightforward, but I’ve found the process is really satisfying when you pull it off. Sun, rain, and years sitting out in the garden can turn your statue’s original finish into a mix of faded tones, mossy greens, and mellow grays. If you add a new coat of paint that’s too shiny or too bold, it can look out of place. Getting that blend just right means a little observation, a bit of experimenting, and an eye for character.
Why Matching Paint to Old Statuary Matters
Garden statues pick up a ton of personality from years outdoors; think chipped edges, lichen blooms, or gentle fading that shows off the statue’s age. When you repaint or repair a section, using a paint that stands out can actually draw more attention to the patch, breaking up the statue’s vintage vibe. I always find that blending new paint with the statue’s weathered surface helps the whole piece look united. That way, it seems like it’s been out in the garden for as long as the original.
The way I see it, matching isn’t just about choosing a single color. It’s about mimicking the whole feel of the statue: the mottling, the softness, and maybe even a bit of roughness. This helps tie your repair or refresh job into the rest of your landscaping instead of having it pop out awkwardly.
Understanding the Patina of Outdoor Statuary
Patina is really just a fancy word for how a surface changes over time. On concrete, stone, or resin garden figures, you’ll see patina as uneven color, dirt set into grooves, or thin patches where water has done its thing. Before picking up a paintbrush, I like to take stock of:
- Color variation: Is the base color mostly gray, or more tan? Are there hints of green from moss, or specks of white from old paint or minerals?
- Surface texture: Rough spots, cracks, or smooth areas change how paint goes on and how light reflects.
- Fading and wear: Some spots soak up more sun or hold water, fading faster or collecting more grime.
Getting a sense of all this lets you break the statue down visually, so you know what you’re aiming for with your paint mix.
Steps for Matching New Paint to Aged Surfaces
Achieving a match with new paint is really about building up layers, not slapping on a single solid color. I recommend following these steps for a seamless look:
- Clean the Surface: Gently scrub the statue with a soft brush and some mild soap. I avoid pressure washers or harsh cleaners, since they can strip away too much character. Let it dry completely.
- Assess and Photograph: Take pictures of the statue in different lighting; morning, noon, and dusk light all change the way colors show up.
- Test Paint Samples: Pick up a few small paint samples that look close to your statue’s dominant shade. Acrylic paints work well for most materials. Test them on an inconspicuous area or spare material, letting each layer dry fully.
- Experiment With Layering: Mix a base tone similar to the statue’s overall color, but a little lighter. Dry brushing or stippling this on works well to mimic the unevenness of age. After it dries, lightly dab on darker or more weathered tones using sponges, old rags, or even your fingers for softer edges.
- Blend Borders: Feather the fresh paint into the edges of the repair area so there aren’t any harsh lines between old and new surfaces.
Pacing yourself by allowing each coat to dry fully is super important. Rushing makes the paint smear or over-saturate, which is much harder to fix later.
Painting Techniques for a Weathered Look
Achieving a natural aged look mainly comes down to technique. Here are some that I’ve found are super useful for garden statuary:
- Dry Brushing: Wipe most of the paint off your brush, then lightly drag it over the raised details. This highlights texture without filling in the grooves, giving depth and that sun-bleached look.
- Sponging: Using a damp sponge to dab paint on random spots makes color variation look more real. Switch up the angle and pressure, so it’s all a bit imperfect.
- Stippling: A stiff brush (an old toothbrush actually works) can speckle the surface, which is a great way to mimic the pitted look of truly old pieces.
- Washes and Glazes: Thin your paint down with water to create a translucent wash, then brush it on and quickly wipe the high points with a rag. This helps color settle in deeper spots just like dirt would over time.
Combining two or three of these techniques adds a more convincing sense of history to your work; worth checking out if you want to go the extra mile. You can also mix in bits of real garden soil or even use a piece of stone or concrete to gently scuff and dull areas of newer paint. This can help create a surface that’s visually close to its aged surroundings.
Choosing Paint Types and Finishes
The paint itself makes a big difference in how your repair holds up. For most outdoor statues, exterior grade acrylic craft paint gives you a good range of colors and stays flexible during weather changes. I steer clear of glossy paints since they often look too shiny and new. Instead, I like a matte or satin finish, which fits in with the statue’s natural wear and keeps the look subtle.
After the paint dries, sealing with a clear matte outdoor sealant keeps moisture and dirt from breaking down your work. I wait at least a full day before applying a sealant, just to be sure the paint has cured. And always double-check if your statue material needs a special kind of primer; sometimes resin or plaster can benefit from an extra prepping step for better paint grip.
Extra Tips for Tricky Repairs
- Color matching chips: If your statue is a popular make or color, some paint stores can use a chip of your old paint to scan and match, which I’ve found pretty handy for large patch jobs.
- Testing outdoors: Paint might switch up in shade once it’s outside, especially in bright sunlight. I always do a test swatch and check it at different times of day before painting the whole section.
- Respect the story: Sometimes, leaving a hint of old wear behind adds to the statue’s story. I avoid overpainting or hiding every imperfection, which keeps that charming, lived in look alive.
Common Challenges and How I Handle Them
- Faded paint vs. dirty areas: It can be hard to tell whether a patch is dirty or just faded. I usually try a simple cleaning first; sometimes that alone blends old and new better than paint would.
- Mismatched repairs standing out: If your repair is still too obvious, adding a glaze or a darker wash right on the seam helps tie it in. Dusting a little real garden soil or rubbing with a stone can take the edge off new paint, too.
- Moss and lichen: Some folks like to fake these details with paint, but I find that using real natural bits from your yard and pressing them into wet sealant sometimes works even better for a natural touch.
Frequently Asked Questions
Q: What type of paint is best for outdoor garden statuary?
A: Exterior grade acrylic paint works well on most stone, concrete, and resin statues. For metal, you might need a rust resistant primer first. Matte and satin finishes usually blend in better than gloss.
Q: How do I avoid a freshly painted area standing out?
A: Layer your paint with dry brushing, washes, or sponging, and feather the edges into the old paint rather than painting solid blocks of color. Matching the finish sheen is just as important as the color.
Q: Do I need to seal the paint afterwards?
A: Yes, sealing with a matte clear coat keeps your work safe from rain, sun, and mildew. Make sure your chosen sealant is meant for outdoor use and is compatible with your paint type.
Q: My statue has lichen or moss—how do I match that?
A: Lightly dabbing on green and yellow paint with a sponge can create the look of moss or lichen. For a really realistic effect, you can even press a bit of real moss into the fresh sealant, especially in cracks and shaded spots.
Quick Reference Guide: Steps to Success
- Study the statue’s current tones in different lighting.
- Start light and build up color slowly to match faded spots.
- Use a mix of painting techniques for a multidimensional finish.
- Always test outdoors before going all in on a large area.
- Seal your work with a proper outdoor protectant for durability.
Giving your weathered garden statuary a new coat of paint doesn’t erase its history. It lets you help the piece keep telling its story in your garden for many more years. Every patch, swipe, and blended edge keeps that timeless charm going strong.
I really enjoyed how this article broke down the process of matching new paint with the natural patina of garden statuary. It’s clear you see restoration as an art form rather than just a repair job. The layering and texture techniques stood out to me because they make the finish feel authentic rather than forced. I also agree that leaving small imperfections keeps the piece’s story intact instead of erasing its history. Do you think there are times when it’s actually better to repaint a statue fully rather than blending repairs into the old finish?
Hi Kavitha ????—love your thoughtful take! You’re so right: restoration really is part science, part art (with a dash of patience and maybe a little dirt under the fingernails). Those imperfections you mentioned are like smile lines on a statue—they show it’s lived a life outdoors and make the story richer.
As for when to fully repaint instead of blending: a few cases pop up. If the original finish is so far gone that it can’t anchor new layers (think heavy flaking, chalking, or deep staining), then a fresh, uniform coat can actually protect the material better long-term. Another time is when the statue has lost almost all of its original character—like a faded resin piece that’s gone completely dull—where repainting gives it a new lease on life. And sometimes it’s purely creative: if you want to shift the look of a piece to match a new garden theme, a full repaint can make it feel cohesive.
Blending keeps the soul intact, but repainting can give a statue a bold “second chapter.” Both are valid—it just depends whether you’re conserving history or reinventing the vibe.